Grrrrrrr.... Won't Start again!!!!!

repairs, maintanence, electrical wizardry, mechanical epiphany, etc.
Forum Sponsored byHP Lubricants
Post Reply
Ric
Posts: 392
Joined: Fri Aug 22, 2008 10:57 pm
Location: Lloydminster, Alberta, Canada

Grrrrrrr.... Won't Start again!!!!!

Post by Ric »

I had this problem twice before, where the bike was running fine. A couple hours of riding, stop for fuel, shut the bike off with the kill switch, fuel it up, go in to pay, and come out and it "barks" once on one cyclinder, then just wirrrrrrrs over. Then, I leave the pump running, and carefully open the throttle wide open, then hit the starter... it chugs once, then just wirrrrs... repeat for awhile, and eventially it just wirrrs over... no more single cylinder bark... just like it's got on gas... however, the problem is... it's got no spark!


I had this problem about 8 months apart, twice before... I replaced coils, Ignition modules, and such. the last time it happened, I pulled (as in - stretched) the little brass spring that makes contact with the coil and the rotor... and it fired right up....


Tomorrow I'm going to try that again.... but I'm wondering if any of you engine gurus out there has experienced this problem...


A little history in all of my last two attempts, to aleviate some of the advice of things that I CERTAINLY tried. But I'm still all ears.


I checked EVERY wire on the bike, to ensure there was NO mechanical damage, and used di-electric grease on EVERY concievable connection point. I last tried four known good ignition modules, and three new coils, to on avial.


I'm thinking of just simply buying an entirely new Distributor assembly.


What I'm also asking, that most of the Auto Supply places have an HEI distributor assembly in a box... but they typically come with Vacuum advance.


Can I buy one of these units, and ditch the existing Vacuum advance components... and it'll work like a stock BB '06 distributor? Or do I have to get a specialized one?


Our winters are long, and summers TOO short to deal with a problem that has left me on the side of the road THREE TIMES!


I'm almost getting scared to ride any distance where I have to shut the bike off before I get home!


S.O.S. ! :evil: :evil: :evil: ... etc.


I posted this on the old site too... as I'm desparate for quality advice on both sites!
Image

"Keep the magic alive!" He said.

Image
Lloydminster, Saskatchewan, Canada
AR
Posts: 992
Joined: Tue Oct 30, 2007 3:40 am

Re: Grrrrrrr.... Won't Start again!!!!!

Post by AR »

maybe its got no spark cause its flooded? Sounds similar to what a lot of us went through after cutting our chokes free 8 years ago when i done mine it took me a few embarrassing hot start attempts to realize not to touch the fucker throttle at all when restarting hot.

Since then no probs for me.
KrautV8
Posts: 394
Joined: Tue Nov 06, 2007 4:29 pm

Re: Grrrrrrr.... Won't Start again!!!!!

Post by KrautV8 »

Ric,
see the pic - the man with the brown jacket, that's Wolfgang. The man he's talking to, that's Andy from Boss Hoss Germany. It was last year in 2009 at the Rally and Wolfgang was describing exactly the same problem to Andy what you have. I remember when he told me a couple days before the Rally that the bike left him stranded to an unknown reason two times when the engine was hot and he had to trailer it home. On sunday, the last day of the Rally it happened for the third time and he was pissed and frustrated like you. In this picture he told his problem to Andy.

Andy said, it's the module or the coil - let's try the coil first, cause it's easier to change. Soon after this picture was taken, they swapped the dist cap with coil from the black bike beside Wolfgang's brown 502 to his bike....and the problem was fixed.

I know you already changed th coil without success, but I wouldn't buy a whole new distributor, I would rather buy an MSD kit - cap, rotor, coil, and module if I were you.

http://www.summitracing.com/parts/MSD-8501/?rtype=10

If it wasn't the problem, and it is a bad ground or something else, then you didn't wasted your money - you did at least something good to your bike, cause the MSD kit is an outstanding, high quality product.

Olaf
Attachments
pullman09 (398).jpg
Ric
Posts: 392
Joined: Fri Aug 22, 2008 10:57 pm
Location: Lloydminster, Alberta, Canada

Re: Grrrrrrr.... Won't Start again!!!!!

Post by Ric »

Olaf....

I tried to purchase one of those MSD kits with PayPal online... to get them to ship it right away. Like you, our winters are long, and riding season too short... but there is only American info, no Canadian or international abilities.... I guess I'll have to phone them after our Easter Holiday to get the 'ball rolling'.

Unless someone like Wildman or a Canadian who has purchased online from Summit cares to chime in....

Time is too precious in these lands to delay in anything where riding is concerned.
Image

"Keep the magic alive!" He said.

Image
Lloydminster, Saskatchewan, Canada
User avatar
CanuckHoss
Site Sponsor
Posts: 2293
Joined: Mon Nov 23, 2009 11:10 am
Location: Airdrie, Alberta, Canada
Contact:

Re: Grrrrrrr.... Won't Start again!!!!!

Post by CanuckHoss »

Ric...have you tried Mopac in Calgary??

They know their shit and we have an account with them....Ray owns the place and Kevin there in parts knows his stuff for sure...they should be able to get anything I beleive.
CanuckHoss

Image
Barry Radu, President Destination Cycles

ImageAirdrie, Alberta Canada

"Just BE HAPPY!! BE HAPPY!! BE HAPPY!!"--Abraham
Ric
Posts: 392
Joined: Fri Aug 22, 2008 10:57 pm
Location: Lloydminster, Alberta, Canada

Re: Grrrrrrr.... Won't Start again!!!!!

Post by Ric »

CanuckHoss wrote:Ric...have you tried Mopac in Calgary??

They know their shit and we have an account with them....Ray owns the place and Kevin there in parts knows his stuff for sure...they should be able to get anything I beleive.

That's the kind of intel that just might solve this problem Barry... but for starters... can you order me a new kill switch for the bike... it seems to be a two part problem... and when I rocked the switch back and forth... I suddenly had power to the coil!

It started right up after another try at cleaning up all the contact points... and adressing the Distributor. I didn't run or attempt to start ... but hit and re-hit the kill switch... and It seemed like success.

But if you order a new switch... that would be good.

Adrian has come up with some thoughts on the Distributor, but because I have a Demon carb, I can't go with vacuum advance. So I'm waiting to hear from him, now that he know's I'm running a Demon.


Also, Olaf suggested I just go to a complete MSD version (Electronic) of the HEI ignition system without pulling the distributor out of the block.


I mentioned that to Adrian... will wait until Monday/Tuesday to hear from him to confirm. THEN I'll order the parts.
Image

"Keep the magic alive!" He said.

Image
Lloydminster, Saskatchewan, Canada
Ric
Posts: 392
Joined: Fri Aug 22, 2008 10:57 pm
Location: Lloydminster, Alberta, Canada

Re: Grrrrrrr.... Won't Start again!!!!!

Post by Ric »

Barry... PM sent. Details on ordering a new 'kill switch'. etc.
Image

"Keep the magic alive!" He said.

Image
Lloydminster, Saskatchewan, Canada
KrautV8
Posts: 394
Joined: Tue Nov 06, 2007 4:29 pm

Re: Grrrrrrr.... Won't Start again!!!!!

Post by KrautV8 »

Ric wrote:Olaf....

I tried to purchase one of those MSD kits with PayPal online... to get them to ship it right away. Like you, our winters are long, and riding season too short... but there is only American info, no Canadian or international abilities....
Ric,
that's an easy one. I order at Summit since more than 10 years and got hundreds of parcels.

Create an account at Summit with your address and everything. After you choosed your items, go on the green button "View our cart". Down on this site, there is a choice of checkout methods. "Summit Checkout", "Paypal Checkout", and "Google Checkout" - choose "Summit Checkout", there is all the international info. Pay with your credit card, and they send it out the same day if the parts are in stock.

As far as the Demon carb and the vacuum advance - you can hook it up to manifold vacuum if the Demon has no ported vacuum. Most people hook their distributor to manifold vacuum anyways, cause they prefer it over ported vacuum. That vacuum advance won't solve your problem, but like Adrian said - it will run smoother and cooler, and will help to bring your milage up.

If you hook it up to manifold vacuum you will loose that impressive Big Block shakin rumble at idle a little, that's the only difference to ported vacuum.

Peter (502 Wingman) installed a Crane Kit CRN-99600-1 a couple years ago to his BB.

You will also have to take care that you don't have too much ignition advance, otherwise you get detonation, pinging. But you can adjust the Crane Kit very easy. I too have it installed to my SB. Very easy to understand instructions.

However, this kit is worth to consider, but it has nothing to do with your problem, and the problem should be fixed before you install other parts to fiddle around, like you already said.
So let's go on and looking for your problem.

Adrian's idea with the light which indicates if the dist gets 12V when the engine dies is a really good one I think. If the dist gets no voltage, no new parts will help at all. I would follow his advice and wire a simple loop with a bulb and cruise near home and shut the engine on and off as often as possible till the problem shows up.

Olaf
Image
Elvis
Posts: 393
Joined: Mon Nov 12, 2007 1:09 am
Location: New Orleans
Contact:

Re: Grrrrrrr.... Won't Start again!!!!!

Post by Elvis »

http://www.lbfun.com/warehouse/tech_inf ... lained.pdf
Carburetor Vacuum Ports:
Manifold, Ported and Venturi Vacuum Explained
by Lars Grimsrud
Colorado Corvette Crazies
The Ultimate Corvette Tuning and Beer Drinking Fraternity
Lafayette, CO Rev. New 9-10-03
This tech paper will discuss the concepts of 3 different types of vacuum sources, and will briefly discuss
their potential uses and applications in tuning GM V8 engines.
Overview
The airflow through a carburetor and through an engine’s intake system creates various pressure regions
due to a variety of effects. The low pressure regions are sources for “vacuum” used for signal sources and
power sources for operating accessories.
“Vacuum” in an engine is not truly a “vacuum.” Rather it defines a lower-than-atmospheric-pressure area
in the engine or in the carburetor. Lower-than-atmospheric pressure is measured in “inches of Mercury.”
Mercury has the chemical symbol “Hg,” so the terminology for the measurement becomes “in. Hg.” To
visualize how this measurement works, imagine a U-shaped glass tube partially filled with Mercury. The
one end of the tube is exposed to the atmosphere. The other end of the tube is attached to your low
pressure source. The low pressure on the one end of the tube will cause the Mercury to rise up the tube.
The amount that it rises is “in. Hg.”
A funny terminology issue arises with this: Most people would describe that the low pressure area is
“sucking” the Mercury up the U-shaped tube. To be technically correct, there is no such thing as “suction.”
What is actually happening is that the low-pressure area is allowing the high pressure on the other end to
“push” the Mercury up the tube. Thus, when you “suck” on a straw in a milkshake, you are not sucking:
You are creating a low pressure region in your mouth, and atmospheric pressure is “pushing” the milkshake
up the straw and into your mouth.
How Vacuum is Produced
In an engine and carburetor there are two different mechanisms (processes) for producing vacuum. The
two are interesting in their differences.
The most commonly recognized vacuum source in an engine is “manifold vacuum.” Manifold vacuum is
created in the intake manifold of an engine due to the pistons’ intake downstroke on one end, and the
restriction created by the partially open carburetor throttle plates on the other end. If the throttle plates are
closed tightly and the pistons are moving quickly, a very high vacuum is created. If the throttle plates are
opened more, creating a larger “leak path,” less vacuum is created. If the pistons are moving slowly and
the throttle plates are wide open, the pressure in the manifold will be very close to atmospheric pressure –
no intake vacuum. Thus, intake vacuum can be used as a signal source to determine how hard an engine is
working.
Less recognized, and more frequently misunderstood, is the term “venturi vacuum.” Venturi vacuum is
produced in an entirely different manner, and it behaves completely independently of manifold vacuum.
To understand venturi vacuum, you have to think back to your high school physics class and the Bernoulli
Effect: As a fluid (liquid or gas) moves through a tube, the areas of low velocity produce high pressure,
and the areas of high velocity produce low pressure. Thus, as the tube necks down and becomes narrow,
the fluid flowing through the narrow section has to move faster, and pressure in the narrow section is lower
than the pressure in the larger section. Venturi vacuum, and the Bernoulli Effect, occurs in the venturi of
the carburetor: As air enters the carb, it passes through the “necked-down” area of the venturi. As it passes
through the venturi, the air accelerates. This fast-moving air creates a low pressure area right in the middle
of the venturi, and this low pressure area is used to discharge fuel from the float bowl of the carb into the
air stream. Remembering our discussing in the Overview of this article, the fuel is not “sucked” out into
the venturi: The low pressure area in the venturi allows atmospheric pressure on top of the fuel in the float
bowl to “push” the fuel up and out of the venturi discharge nozzles. The venturi vacuum varies only by the
total amount (“mass”) of airflow passing through the venturi and its velocity: The faster the air is passing
through (more air), the higher the venturi vacuum will be. This is completely independent of the manifold
vacuum.
How Vacuum is Used
Manifold vacuum is very easy to tap and utilize: Simply drill a hole in the intake manifold and stick a hose
in it. This vacuum can then be used to power accessories (headlight doors and heater controls), or it can be
used as a signal source based on how hard the engine is working. One such signal source application is
distributor vacuum advance: When the engine is working lightly (high vacuum produced), the ignition is
advanced, and as the engine loses vacuum due to the throttle being mashed to the floor, vacuum is lost and
ignition is retarded. Pretty simple.
But what if you want to “switch” the vacuum on and off based on whether the engine is just idling or in
cruise mode? Enter the term “Ported Vacuum.”
When emissions became a priority to vehicle manufacturers, a method had to be found to reduce emissions
at idle. The amount of Hydrocarbons emitted out of the tailpipe can be drastically altered by changing the
timing: Retarding the timing reduces Hydrocarbon emissions. But retarded timing adversely affects gas
mileage at cruise. So a method was needed to retard timing at idle, yet maintain it at normal levels for
cruise. The solution was seen to “turn off” the vacuum advance at idle, yet have it operate normally under
all other operating conditions. To do this, a small hole was drilled in the carburetor throttle body just above
the position of the throttle plate at idle (NOT in the venturi area), and this hole was connected to a vacuum
nipple on the carb. When the throttle plates are closed at idle, they act as an “off” switch to block the
drilled hole from manifold vacuum. As the throttle plates are opened up, the hole becomes fully exposed to
manifold vacuum, and normal manifold vacuum is realized at the nipple. Thus, you have a manifold
vacuum “on-off” switch, turning manifold vacuum “off” at idle, and restoring it to normal operation once
the throttle plate is cracked open. Vacuum advance can be eliminated at idle for good emissions, and
instantly restored to normal operation at cruise. At both cruise and Wide Open Throttle (WOT), manifold
vacuum and ported vacuum are exactly the same: There is high vacuum at cruise, and virtually no vacuum
at WOT. The difference in vacuum occurs only at idle.
So if there is no manifold vacuum or ported vacuum at WOT, how can vacuum open the secondaries on a
vacuum secondary carb at WOT? Manifold or ported vacuum is not used to open the secondaries: The
secondaries are opened by venturi vacuum. On a true vacuum secondary carb (Holley and BG are the only
real vacuum secondary carbs – Q-Jets and AFBs are not vacuum secondary carbs), there is a small hole
drilled right into the middle of the venturi wall on the passenger side primary venturi. This passage runs
over to the vacuum diaphragm, and the low pressure created in the primary venturi from very high airflow
through the venturi is used to open the secondary throttle shaft. The more air that passes through the
primary side, the more the secondary diaphragm will open. It is strictly a function of airflow through the
primary venturi and the low pressure that this creates in the venturi. Manifold vacuum can be non-existent,
yet if the airflow through the carb is high, the secondaries will be pulled open by the venturi vacuum. Note,
however, that there is no external nipple on any carb for venturi vacuum: The only source is the small
drilled hole in the venturi, and this hole only runs to the secondary diaphragm through an internal passage.
Thus, we see that we have 3 types of vacuum in the engine: Manifold Vacuum, Ported Vacuum (simply a
“switched” manifold vacuum source), and Venturi Vacuum. Of these, only Manifold Vacuum and Ported
Vacuum can be utilized for tuning purposes.
Tuning with Vacuum
I see a lot of discussion and confusion regarding the use of Ported Vacuum versus Manifold Vacuum for
distributor vacuum advance. Once understood, the tuner can effectively utilize one source or the other,
depending on the tuning requirements of the vehicle. There is no right or wrong answer on which source to
use, but using the correct source for the tuning requirements of a given engine can have a big effect on offidle
and near-idle performance characteristics.
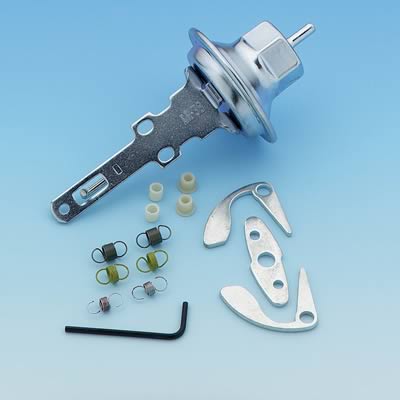
First, be sure to locate and read my paper titled “Distributor Vacuum Advance Control Units.” This
contains a lot of technical information related to this issue that I won’t be repeating under this paper
heading.
The timing advance curve requirements for an engine will vary a bit from one engine to another depending
on cam, compression ratio and other efficiency factors. But in general terms, most GM V8s will produce
peak power at WOT with 36-38 degrees of ignition timing. Peak fuel economy and drivability at cruise is
achieved with about 52-54 degrees of advance. Best idle quality has a much wider range depending on cam
& engine, but tends to be in the 12-24 degree range. Lowest emissions usually occur with timing in the 4-8
degree range.
When tuning, it is important to realize that the upper limits on timing are determining factors for how to set
things up: You want the total WOT timing (the maximum timing the engine will see with vac advance
disconnected and with the centrifugal advance fully deployed) to be not over 38 degrees. 36 is the best
setting for most applications. Once this has been set, it automatically determines what your initial advance
ends up being unless you physically alter the length of the advance curve. In most cases, once total
advance has been set to 36, the initial advance will end up being about 12 degrees-or-so. And, since most
vacuum advance control units pull in about 16 degrees of vacuum advance at cruise speed (where the full
centrifugal advance will also be deployed), the 36-degree setting will produce 52 degrees of total combined
advance at cruise with the vac advance fully deployed.
But what if your engine/cam combination idles best at 26 degrees advance? Radical cams often require
quite a bit of advance at idle. If you simply bump the initial timing up from 16 to 26, your total WOT
advance will go from 36 to 46. The total combined timing at cruise will go from 52 to 62. This is not
acceptable, and can result in severe engine damage from detonation at WOT, and the car will chug and jerk
at cruise from the over-advanced condition. An appropriately selected vacuum advance unit, plugged into
manifold vacuum, can provide the needed extra timing at idle to allow a fair idle, while maintaining
maximum mechanical timing at 36. A tuning note on this: If you choose to run straight manifold vacuum
to your vacuum advance in order to gain the additional timing advance at idle, you must select a vacuum
advance control unit that pulls in all of the advance at a vacuum level 2 in. Hg below (numerically less
than) the manifold vacuum present at idle. If the vacuum advance control unit is not fully pulled in at idle,
it will be somewhere in its mid-range, and it will fluctuate and vary the timing while the engine is idling.
This will cause erratic timing with associated unstable idle rpm. A second tuning note on this: Advancing
the timing at idle can assist in lowering engine temperatures. If you have an overheating problem at idle,
and you have verified proper operation of your cooling system components, you can try running manifold
vacuum to an appropriately selected vacuum advance unit as noted above. This will lower engine temps,
but it will also increase hydrocarbon emissions on emission-controlled vehicles.
If, however, your engine idles best in the 12-16 degree range due to a mild cam, plug the vacuum advance
control unit to a ported vacuum source to eliminate the vacuum signal at idle. You will still obtain the 36-
degree WOT total, and you’ll still have 52 at cruise. Also, if you need to pass an emissions test, use the
ported source to reduce your hydrocarbons.
By playing with the total length of your centrifugal advance curve, selecting between ported or manifold
vacuum, and carefully selecting a matched vacuum advance control unit that meets your specification
requirements, you can achieve an optimum idle, excellent off-idle throttle response, and the best fuel
economy possible.
Questions, Comments & Technical Assistance
If you have questions or comments regarding this article, or if you notice any errors that need to be
corrected (which is quite possible since I’m writing this from memory…), please feel free to drop me an email.
Also, if you need any technical assistance or advice regarding this process, or other maintenance
issues, feel free to contact me:
V8FastCars@msn.com
Last edited by Elvis on Sun Apr 04, 2010 5:57 am, edited 2 times in total.
Image
Elvis
Posts: 393
Joined: Mon Nov 12, 2007 1:09 am
Location: New Orleans
Contact:

Re: Grrrrrrr.... Won't Start again!!!!!

Post by Elvis »

http://www.corvette-restoration.com/res ... v_Spec.pdf
Distributor Vacuum Advance Control units
Specs and facts for GM Point-Style Distributors
by Lars Grimsrud
SVE Automotive Restoration
Musclecar, Collector & Exotic Auto Repair & Restoration
Broomfield, CO Rev. B 8-19-02
I've been seeing a lot of discussion and questions regarding distributor vacuum advance control units; what do they
do, which ones are best, what was used on what, etc., etc. To clarify some of this, I thought I'd summarize a few
facts and definitions, and provide a complete part number and specification listing for all vacuum advance control
units used by Chevrolet on the points-style distributors. I'm also providing a listing of the specs for all other GM
(non-Chevrolet) control units, but without the specific application listed for each (it would take me a bit too much
time to research each part number by application across each of the GM Motor Divisions - it took me long enough to
compile just the Chevy stuff…!). This latest revision to this paper also includes the HEI listings (the HEI
distributors use a longer control unit, so the non-HEI and HEI vacuum advance control units CANNOT be
interchanged).
As always, I'm going to include the disclaimer that many of these are my own comments and opinions based on my
personal tuning experience. Others may have differing opinions & tuning techniques from those presented here. I
have made every attempt to present factual, technically accurate data wherever possible. If you find factual errors in
this information, please let me know so I can correct it.
Background
The vacuum advance control unit on the distributor is intended to advance the ignition timing above and beyond the
limits of the mechanical advance (mechanical advance consists of the initial timing plus the centrifugal advance that
the distributor adds as rpm comes up) under light to medium throttle settings. When the load on the engine is light
or moderate, the timing can be advanced to improve fuel economy and throttle response. Once the engine load
increases, this "over-advance" condition must be eliminated to produce peak power and to eliminate the possibility
of detonation ("engine knock"). A control unit that responds to engine vacuum performs this job remarkably well.
Most GM V8 engines (not including "fast-burn" style heads), and specifically Chevys, will produce peak torque and
power at wide open throttle with a total timing advance of 36 degrees (some will take 38). Also, a GM V8 engine,
under light load and steady-state cruise, will accept a maximum timing advance of about 52 degrees. Some will take
up to 54 degrees advance under these conditions. Once you advance the timing beyond this, the engine/car will start
to "chug" or "jerk" at cruise due to the over-advanced timing condition. Anything less than 52 degrees produces less
than optimum fuel economy at cruise speed.
The additional timing produced by the vacuum advance control unit must be tailored and matched to the engine and
the distributor's mechanical advance curve. The following considerations must be made when selecting a vacuum
advance spec:
How much engine vacuum is produced at cruise? If max vacuum at cruise, on a car with a radical cam, is only 15
inches Hg, a vacuum advance control unit that needs 18 inches to peg out would be a poor selection.
How much centrifugal advance ("total timing") is in effect at cruise rpm? If the distributor has very stiff centrifugal
advance springs in it that allow maximum timing to only come in near red-line rpm, the vacuum advance control
unit can be allowed to pull in more advance without the risk of exceeding the 52-degree maximum limit. If the
engine has an advance curve that allows a full 36-degree mechanical advance at cruise rpm, the vacuum advance
unit can only be allowed to pull in 16 more degrees of advance.
Are you using "ported" or "manifold" vacuum to the distributor? "Ported" vacuum allows little or no vacuum to the
distributor at idle. "Manifold" vacuum allows actual manifold vacuum to the distributor at all times.
Does your engine require additional timing advance at idle in order to idle properly? Radical cams will often require
over 16 degrees of timing advance at idle in order to produce acceptable idle characteristics. If all of this initial
advance is created by advancing the mechanical timing, the total mechanical advance may exceed the 36-degree
limit by a significant margin. An appropriately selected vacuum advance unit, plugged into manifold vacuum, can
provide the needed extra timing at idle to allow a fair idle, while maintaining maximum mechanical timing at 36. A
tuning note on this: If you choose to run straight manifold vacuum to your vacuum advance in order to gain the
additional timing advance at idle, you must select a vacuum advance control unit that pulls in all of the advance at a
vacuum level 2" below (numerically less than) the manifold vacuum present at idle. If the vacuum advance control
unit is not fully pulled in at idle, it will be somewhere in its mid-range, and it will fluctuate and vary the timing
while the engine is idling. This will cause erratic timing with associated unstable idle rpm. A second tuning note on
this: Advancing the timing at idle can assist in lowering engine temperatures. If you have an overheating problem
at idle, and you have verified proper operation of your cooling system components, you can try running manifold
vacuum to an appropriately selected vacuum advance unit as noted above. This will lower engine temps, but it will
also increase hydrocarbon emissions on emission-controlled vehicles.
Thus, we see that there are many variables in the selection of an appropriate control unit. Yet, we should keep in
mind that the control unit is somewhat of a "finesse" or "final tuning" aid to obtain a final, refined state of tune; we
use it to just "tweak" the car a little bit to provide that last little bit of optimization for drivability and economy. The
vacuum advance unit is not used for primary tuning, nor does it have an effect on power or performance at wide
open throttle.
With these general (and a little bit vague, I know…) concepts in mind, let's review a few concepts and terms. Then
it's on to the master listing of specs and parts…..:
Part Number
There are many different sources for these control units. Borg Warner, Echlin, Wells, and others all sell them in
their own boxes and with their own part numbers. Actually, there are very few manufacturers of the actual units:
Dana Engine Controls in Connecticut manufactures the units for all three of the brands just mentioned, so it doesn't
make much difference who you buy from: They're made by the same manufacturer. The part numbers I have listed
here are the NAPA/Echlin part numbers, simply because they are available in any part of the country.
ID#
Every vacuum advance control unit built by Dana, and sold under virtually any brand name (including GM), has a
stamped ID number right on top of the mounting plate extension. This ID, cross referenced below, will give you all
specifications for the unit. So now, when you're shopping in a junkyard, you'll be able to quickly identify the "good"
vs. the "bad" control units.
Starts @ "Hg
Vacuum is measured in "inches of Mercury." Mercury has the chemical symbol "Hg." Thus, manifold vacuum is
measured and referred to as "Hg. The "Start" spec for the control unit is a range of the minimum vacuum required to
get the control unit to just barely start moving. When selecting this specification, consideration should be made to
the amount of vacuum that a given engine produces, and what the load is on the engine at this specification. For
example, an engine with a very radical cam may be under very light load at 7 inches Hg, and can tolerate a little
vacuum advance at this load level. Your mom's Caprice, on the other hand, has such a mild cam that you don't want
the vacuum to start coming in until 9 - 10 inches Hg. For most street driven vehicle performance applications,
starting the vacuum advance at about 8" Hg produces good results.
Max Advance
Since the vacuum advance control unit is a part of the distributor, the number of degrees of vacuum advance is
specified in DISTRIBUTOR degrees - NOT crankshaft degrees. When talking about these control units, it is
important that you know whether the person you're talking to is referring to the distributor degrees, or if he's talking
crankshaft degrees. All of the listings shown in the following chart, and in any shop manual & technical spec sheet,
will refer to distributor degrees of vacuum advance. You must DOUBLE this number to obtain crankshaft degrees
(which is what you "see" with your timing light). Thus, a vacuum advance control unit with 8 degrees of maximum
advance produces 16 degrees of ignition advance in relationship to the crankshaft. When selecting a unit for max
advance spec, the total centrifugal timing at cruise must be considered. Thus, a car set up to produce 36 degrees of
total mechanical advance at 2500 rpm needs a vacuum advance control unit producing 16 degrees of crankshaft
advance. This would be an 8-degree vacuum advance control unit.
Max Advance @ "Hg
This is the range of manifold vacuum at which the maximum vacuum advance is pegged out. In selecting this
specification, you must consider the vacuum produced at cruise speed and light throttle application. If your engine
never produces 20" Hg, you better not select a control unit requiring 21" Hg to work.
The following listing (Non-HEI) is as follows: The first two part number listings are the two numbers that are most
commonly used in a Chevrolet performance application. The "B1" can is the most versatile and user-friendly unit
for a good performance street engine. As you can see, it was selected by GM for use in most high performance
engines due to its ideal specs. The "B28" can was used on fuel injected engines and a few select engines that
produced very poor vacuum at idle. The advance comes in very quick on this unit - too quick for many performance
engines. Do not use this very quick unit unless you have a cam/engine combination that really needs an advance like
this. It can be used as a tuning aid for problem engines that do not respond well to other timing combinations, and
can be successfully used in applications where direct manifold vacuum is applied to the can (see paragraph and
discussion on this above)
After this, the listing is by Echlin part number. The Chevrolet applications are listed first by application, followed
by a complete listing of all of the units used on any GM product (all GM units are interchangeable, so you can use a
Cadillac or GMC Truck unit on your Vette, if that's what you want to do).
Non-HEI Distributors:
P/N ID# Application Starts @ “Hg Max Adv
(Distr. Degrees @ “Hg.)
VC680 B1 1959 – 63 All Chevrolet 8-11 8 @ 16-18
1964 Corvette exc. FI
1964 Impala, Chevy II
1965 396 High Perf.
1965-67 283, 409
1966-68 327 exc. Powerglide
1967-68 All 396
1969 Corvette 427 High Perf.
1969 396 Exc. High Perf.
1969 Corvette 350 TI
1969-70 302 Camaro
1970 400 4-bbl
1970 396 High Perf.
1970 Corvette 350 High Perf.
1973-74 454 Exc. HEI
VC1810 B28 1965 409 High Perf. 3-5 8 @ 5.75-8
1965 327 High Perf.
1966 327 High Perf.
1964-67 Corvette High Perf. FI
------------------------------------------------------------------------------------------------------------------------------------------
-
VC1605 B9 1965 impala 396 Exc. High Perf. 7-9 10.3 @ 16-18
1965 327 All Exc. FI
1969 327 Camaro, Chevelle, Impala
1969-70 Corvette 350 Exc. High Perf.
1969-70 350 4-bbl Premium Fuel
1970 350 Camaro, Chevelle, Impala High Perf.
1971-72 350 2-bbl AT
1971-72 307 All
VC1675 B13 1968 327 Camaro Powerglide 9-11 8 @ 16-18
1968 327 Impala AT
1968 307 AT
1968 302, 307, 327, 350 Camaro, Chevy II
1970 350 Camaro, Chevelle Exc. High Perf.
VC1760 B19 1969 350 Camaro, Chevelle, Impala 4-bbl 5.5-8 12 @ 14-18
1969-70 350 2-bbl
VC1765 B20 1965 396 Impala High Perf 5-7 8 @ 11-13
1966-67 Corvette Exc. High Perf.
1966-67 Impala 427 Exc. High Perf.
1966-68 327 Powerglide Exc. High Perf.
1969 307 All
1969-70 396, 427 Camaro, Chevelle High Perf.
1970 400 2-bbl
1970 307 MT
1973 Camaro 350 High Perf.
VC1801 B21 1971 350 2-bbl 7-9 10 @ 16-18
1971-72 400, 402
1971-72 307 AT
VC1802 B22 1971-72 350 4-bbl 7-9 8 @ 14-16
Other Part Numbers & Specs:
VC700 B3 8-10 11.5 @ 19-21
VC1415 M1 6-8 10 @ 13-15
VC1420 M2 5-7 11 @ 16-17
VC1650 B12 8-10 10 @ 15-17
VC1725 B18 8-10 12 @ 13-16
VC1740 A5 6-8 12 @ 15-17.5
VC1755 A7 8-10 12.5 @ 18-20.5
VC1804 B24 6.5-8.5 10 @ 12-14
VC1805 M13 6-8 12 @ 14.5-15.5
VC1807 B25 5-7 8 @ 13-15
VC1808 B26 5-7 8 @ 11-13
VC1809 B27 5-7 9 @ 10-12
VC1812 B30 5-7 12 @ 11.75-14
The following listing (HEI) is as follows: The first four part number listings are the 4 numbers that are most
commonly used in a Chevrolet performance application. The "AR12" can is the most versatile and user-friendly
unit for a good performance street engine. The AR 15 and AR23 are almost identical, with only slight variations in
their "start-stop" specs. The "AR31" can is the HEI equivalent to the "B28" Hi-Perf can used on the early engines:
The advance comes in very quick on this unit - too quick for many performance engines. Do not use this very quick
unit unless you have a cam/engine combination that really needs an advance like this. It can be used as a tuning aid
for problem engines that do not respond well to other timing combinations, and can be successfully used in
applications where direct manifold vacuum is applied to the can (see paragraph and discussion on this above)
After this, the listing is by Echlin part number. All GM HEI vacuum advance units are interchangeable, so you can
use a Cadillac or GMC Truck unit on your Vette, if that's what you want to do.
HEI Distributors:
P/N ID# Application Starts @ “Hg Max Adv
(Distr. Degrees @ “Hg.)
VC1838 AR12 1975 350 Buick 7-9 7 @ 10-12
VC1843 AR15 1977 305 All Exc. Hi Alt, Exc, Calif. 3-5 7.5 @ 9-11
1974 400 All w/2-bbl
1977 305 El Camino
1976 262 Monza Exc. Calif
1976 350 Vette Hi Perf, Incl. Calif
1975 350 Z-28
1977 305 Buick Skylark
VC1853 AR23 1976 350 All Calif. 5-7 7.5 @ 11-12.5
1976 350 Vette Calif., Exc. Hi Perf
1976 400 All, Exc. Calif
1975 350 4-bbl
1974 350 All w/1112528 Distr.
1978 350/400 Heavy Duty Truck, Exc. Calif, Exc. Hi Alt.
VC1862 AR31 2-4 8 @ 6-8
------------------------------------------------------------------------------------------------------------------------------------------
-
VC1703 N/A 1978-79 Vette Special Hi Perf N/A N/A
1979 305 El Camino Calif.
1978-79 350 Blazer & Suburban
1979 Buick 305/350
VC1825 AR1 1976 454 Caprice, Impala 3-5 9 @ 6-8
1975 454 Caprice, Chevelle, Monte, Suburban
VC1826 AR2 5-7 12 @ 10-13
VC1827 AR3 5-7 9 @ 9-11
VC1828 AR4 1975-76 350 Buick & Olds 6-9 10 @ 12-14
1976 350 Pontiac
VC1831 AR7 6-8 12 @ 14-16
VC1832 AR8 1975-76 455 Buick Electra 4-6 12 @ 12-14
VC1833 AS1 1975-76 500 Cadillac Exc. Calif. 4-6 14 @ 15-16
VC1834 AR9 4-6 13 @ 13-16
VC1835 AS2 1975-76 350 Olds 5.5-7.5 12 @ 15-17
VC1836 AR10 1977 305 All Hi Alt, Exc. Calif. 3-5 9 @ 11-13
1977 350 All exc. Calif.
1977 350 Vette Exc. Calif, Exc. Hi Perf
1976 305 All Exc. Calif
1976 350 All Exc. Vette, Exc. Calif
1976 350 Vette Exc. Calif., Exc. Hi Perf
1975 262, 350 All w/2-bbl carb
1975 350 All 4-bbl w/ 1112880 & 1112888 Distr.
1977 305 Chev Truck Light Duty
1975-76 350 El Camino 2-bbl
VC1837 AR11 1976 305 Blazer, Exc. Calif 6-8 12.5 @ 10.5-13.5
1976 350/400/455 Pontiac 4-bbl
VC1839 AR13 4-6 12 @ 11-13
VC1840 AR14 1975-76 350/400/455 Pontiac Firebird 6-8 10 @ 9-12
VC1841 AS3 1975-76 500 Cadillac Calif. 5-7 10 @ 13-14
VC1842 AS4 1976 350 Olds Cutlass 5-7 12 @ 13-15
VC1844 AR16 3-5 12 @ 13.5-15.5
VC1845 AS5 1978-79 425 Cadillac w/F.I. 4-6 14 @ 14-16
1977 425 Cadillac
VC1846 AR17 1977 301 Buick Skylark 3-6 13 @ 10-13
1977 301 Pontiac
VC1847 AS6 1978 403 Motor Home 4-6 12 @ 12-14
1977-79 350/403 Buick LeSabre Hi Alt, Riviera, Olds
1977-79 350/403 Pontiac Hi Alt
VC1848 AR18 4-6 12 @ 9-12
VC1849 AR19 4-6 12 @ 7-10
VC1850 AR20 1977 350/400 Pontiac 4-6 10 @ 8-11
VC1851 AR21 1977-79 350 Buick LeSabre, Century 5-7 12 @ 11-13
1978-79 350 Pontiac
VC1852 AR22 77-78 305/350/400 Chev Truck, Heavy Duty7-9 5 @ 12-14
1975-76 350/400 Chev Truck Heavy Duty
VC1854 AR24 3-5 13 @ 10-13
VC1855 AS7 1977-79 260 Olds Cutlass 3-5 15 @ 10-12
VC1856 AR25 3-6 15 @ 10-14
VC1857 AR26 3-6 12 @ 13-16
VC1858 AR27 1978-79 305 All 3-6 9 @ 11-13
1978 350 Camaro
1978 305 Chev Truck, M/T, Light Duty
1978 350 Chev Truck Hi Alt
1978 305/350 Buick & Olds
1978-79 305 Pontiac
VC1859 AR28 1979 350 Vette Exc Hi Perf 3-6 10 @ 9-12
1978-79 305 w/1103282 Distr., Incl. El Camino A/T
1979 350 Camaro, Impala, Nova, Malibu, Monte
1979 350 Suburban
1979 350 Buick Century
1978 305/350 Buick & Olds
1978-79 305 Pontiac Hi Alt.
VC1860 AR29 3-6 12 @ 10-13
VC1861 AR30 1978-79 301Buick 3-5 13 @ 11-13
1979 301 Olds
1978-79 301 Pontiac
VC1863 AR32 2-4 10 @ 11-13
VC1864 AR33 1978 305 Chev Truck, A/T, Light Duty 4.5-6.5 13 @ 11-13
VC1865 AR34 1973-74 350 Vette Special Hi Perf 3-5 15 @ 8.5-11.5
VC1866 AS8 1978-79 425 Cadillac w/carb 3-5 14 @ 13-15
VC1867 AS9 2-4 10 @ 8-10
VC1868 AR35 1979 305 Chev Truck & El Camino 2-4 10 @ 6-9
1979 305 Buick & Olds
1979 305 Pontiac A/T
VC1869 AS10 2-4 12 @ 8-11
Image
Elvis
Posts: 393
Joined: Mon Nov 12, 2007 1:09 am
Location: New Orleans
Contact:

Re: Grrrrrrr.... Won't Start again!!!!!

Post by Elvis »

Ric wrote: Adrian has come up with some thoughts on the Distributor, but because I have a Demon carb, I can't go with vacuum advance. So I'm waiting to hear from him, now that he know's I'm running a Demon.
Ric, I dont know about your particular Demon, but here is what I found.
"Demon carburetors feature two small vacuum ports on the passenger side of the baseplate. The front port is for ported vacuum. The rear port is for manifold vacuum. CHP "
Image
Image
Image
hogv8
Posts: 1170
Joined: Mon Nov 12, 2007 8:56 pm
Location: S W Florida

Re: Grrrrrrr.... Won't Start again!!!!!

Post by hogv8 »

As far as the kill switch goes or any handle bar switch for that matter I have taken them apart and cleaned the contacts . They do get corroded . After cleaning use Dielectric .

Jack
Image
Ric
Posts: 392
Joined: Fri Aug 22, 2008 10:57 pm
Location: Lloydminster, Alberta, Canada

Re: Grrrrrrr.... Won't Start again!!!!!

Post by Ric »

Awesome intel Elvis!

I've learned everything I ever knew about vacuum advance prinipals simply by reading these two articles! Thanks a bunch!

Olaf suggested that if I go with vacuum advance, that I may loose a little of that Rumpity-rump idle, but will run cooler, and improve fuel economy. (I must be carefull on how cool I allow this engine to run, as our temps. here in Canada are WAY cooler than you cats in the good 'ol U.S. of A.)

Worth a consideration, once I've sorted out my electrical problem.

Would you know if I were to order an MSD package for my BB, can I ADD the vacuum set up to it? Or will I need to decide on the Vacuum issue BEFORE I select the Ignition parts?
Image

"Keep the magic alive!" He said.

Image
Lloydminster, Saskatchewan, Canada
KrautV8
Posts: 394
Joined: Tue Nov 06, 2007 4:29 pm

Re: Grrrrrrr.... Won't Start again!!!!!

Post by KrautV8 »

Ric wrote:Awesome intel Elvis!

I've learned everything I ever knew about vacuum advance prinipals simply by reading these two articles! Thanks a bunch!

Olaf suggested that if I go with vacuum advance, that I may loose a little of that Rumpity-rump idle, but will run cooler, and improve fuel economy. (I must be carefull on how cool I allow this engine to run, as our temps. here in Canada are WAY cooler than you cats in the good 'ol U.S. of A.)

Worth a consideration, once I've sorted out my electrical problem.

Would you know if I were to order an MSD package for my BB, can I ADD the vacuum set up to it? Or will I need to decide on the Vacuum issue BEFORE I select the Ignition parts?
Ric,
you only loose a little of the rumpity-rump idle if you hook it up to manifold vacuum. If you go with ported, then the advance unit has no affect on the idle characteristics, cause ported vacuum is above the throttle plates and shows no vacuum at idle.

So, if you hook it up to ported you should be fine as far as the BB sound goes 8-)

Olaf
Image
Elvis
Posts: 393
Joined: Mon Nov 12, 2007 1:09 am
Location: New Orleans
Contact:

Re: Grrrrrrr.... Won't Start again!!!!!

Post by Elvis »

Image
Tom
Posts: 312
Joined: Tue Nov 13, 2007 10:31 am

Re: Grrrrrrr.... Won't Start again!!!!!

Post by Tom »

The MSD kit still does not cover the pick up coil in the distributor.
KrautV8
Posts: 394
Joined: Tue Nov 06, 2007 4:29 pm

Re: Grrrrrrr.... Won't Start again!!!!!

Post by KrautV8 »

Tom,
to be honest, I never spend the pick up coil any attention, not even knowing that it exists before you mentioned it...hahahaha...again I learned something from the old dogs. (.)<

I found good instructions how to check the pick up coil, Ric! Here it is, I hope that helps:
http://www.73-87.com/7387garage/drivetrain/pkupcoil.htm

Olaf
Last edited by KrautV8 on Sun May 02, 2010 2:58 pm, edited 1 time in total.
User avatar
CanuckHoss
Site Sponsor
Posts: 2293
Joined: Mon Nov 23, 2009 11:10 am
Location: Airdrie, Alberta, Canada
Contact:

Re: Grrrrrrr.... Won't Start again!!!!!

Post by CanuckHoss »

Ric...

Did you ever get this rectified???????????????
CanuckHoss

Image
Barry Radu, President Destination Cycles

ImageAirdrie, Alberta Canada

"Just BE HAPPY!! BE HAPPY!! BE HAPPY!!"--Abraham
KrautV8
Posts: 394
Joined: Tue Nov 06, 2007 4:29 pm

Re: Grrrrrrr.... Won't Start again!!!!!

Post by KrautV8 »

Tom wrote:The MSD kit still does not cover the pick up coil in the distributor.
Tom,
two weeks ago, at the European Boss Hoss rally, I heard for the first time of such a pick up coil here in Europe which went south. It was again Wolfgang's (owner of Pullman City) 502.

He was on a round trip with Peter (502Wingman) a couple weeks ago when the bike died. It had to be trailered home and later it turned out to be a bad pick up coil. I remembered your words when they told me the story.

Olaf
Image
Ric
Posts: 392
Joined: Fri Aug 22, 2008 10:57 pm
Location: Lloydminster, Alberta, Canada

Re: Grrrrrrr.... Won't Start again!!!!!

Post by Ric »

Barry,

I had to wait awhile before I could answer your question Barry. I haven't installed the new kill switch yet, but I did replace the fan 'off' switch you initially installed. (As the ball and spring- were getting weak)... so now, I shut the fan off each time before I shut off the bike. (I wait about three to five seconds for the fan to spool down to 'stand-still'... then I shut the ignition off. So it cannot possibly 'back feed' through the ignition system.

I've also put in the MSD ignition system, and since have had no problems.

So far, the only issues I'm haunted with today is:

1. pulsing idle when the bike is warm. It wants to quit if you don't manually manipulate idle to 750 rpms. (I'll chat up Lee Robertshaw about that one)

2. Sappy front brakes: I nearly dumped my bike, but managed to get footing to pick it back up before it went over too far to do so. BUT, I had my hand on the front brake lever, and it put an immense load on the hydraulics. No leaks, but now it takes much more squeeze pressure on the lever to get the front brakes to perform like they did before the incident. (I'm not sure if it's related... but I'll replace the brake fluid soon, and see if the pads and rotors are still happily working properly together)

3. Bouncy shocks: Still rubbing on the fender bolts, carving a 'new tread' into the rear tire. Adrian suggested I wind the shocks up until the problem goes away. and This winter send the shocks to Aldan, for warranty, stating I need the springs to reflect the changes in the adjustments, only that the 'adjuster' should be at the bottom again. (300 + lb springs) My adjustment is at the Half-way point now... just need to find a set of those damn spanner wrenches!
Image

"Keep the magic alive!" He said.

Image
Lloydminster, Saskatchewan, Canada
Post Reply